MTB suspension tuning is the absolute key to getting the best performance out of your bike. It doesn't matter whether you paid 300 or 1500 euros for your fork – if it isn't set up for your weight and riding style, it won't do its job. Once you dial in SAG, rebound and compression, your riding becomes incomparably safer, more comfortable and faster.
1. Intro: Why Does MTB Suspension Tuning Matter So Much?
Mountain biking is a sport where the ground is constantly changing. Your suspension is one of the most important systems on the bike because it directly and continuously affects control, grip (traction), safety and injury prevention.
Whether you ride light XC (Cross-Country), explore trail and enduro trails, or drop down rough downhill lines, a perfectly set up fork and rear shock dramatically change how the bike "irons out" the terrain beneath you. This guide gives you a complete setup system — ideal for both recreational and advanced riders.

2. SAG — The Foundation of Every Setup
What exactly is SAG?
SAG is the term for how far your suspension "sinks" into its travel under your body weight (together with all your gear, backpack and helmet) while you sit or stand still on the bike. A correct SAG setup lets the wheel drop into holes and keeps the tire in constant contact with the ground.

Recommended SAG values:
- XC / Marathon: 20–25% (firmer, for maximum pedaling efficiency).
- Trail / All-Mountain: 25–30% (a balance between efficiency and bump absorption).
- Enduro / Downhill: 30–35% (softer, for maximum grip on rough terrain).
How to measure SAG accurately:
- Set the air pressure in your fork/shock with a high-pressure shock pump (for accurate starting values, use our Suspension Setup Calculator).
- Get on the bike in a neutral "Attack" position, lightly leaning against a wall.
- Ask a friend to slide the rubber O-ring all the way down to the body (wiper) of the suspension.
- Carefully step off the bike without any sudden jerks and measure how far the suspension has sunk.
- Add or release air pressure until you reach the percentage you want.
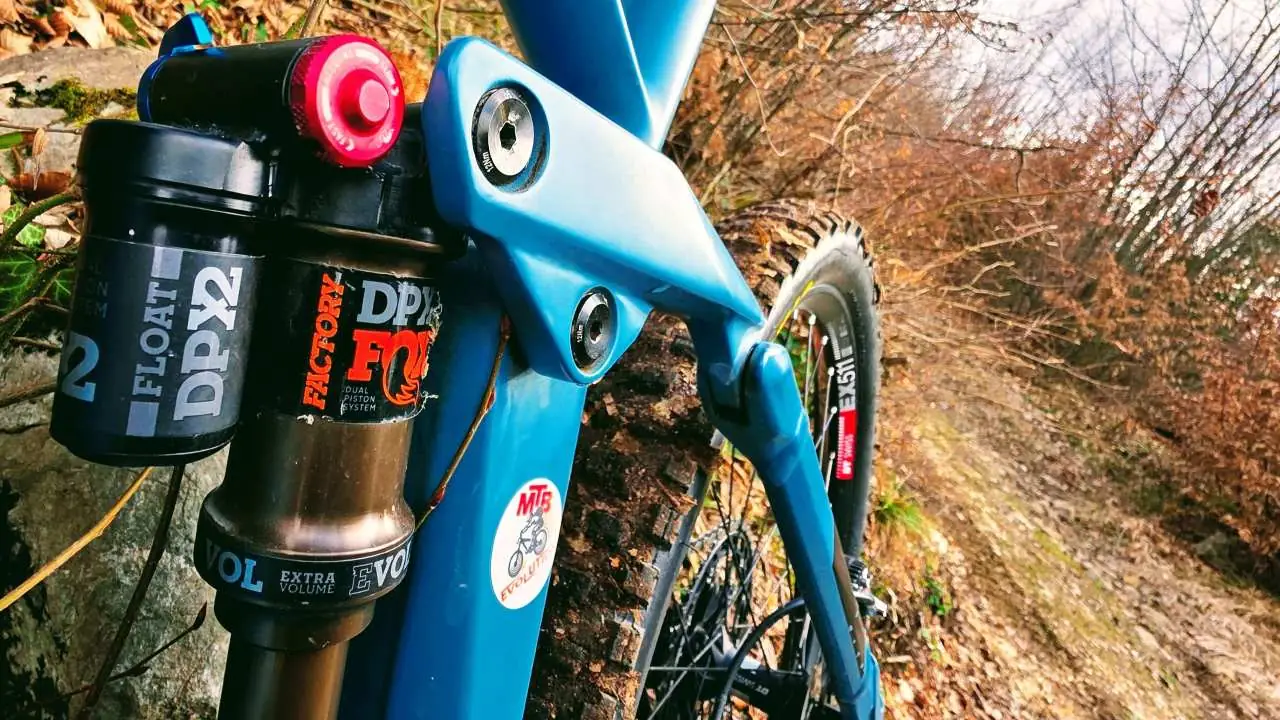
3. Rebound — How Fast the Suspension Returns
Why is rebound so important?
Rebound controls how quickly the fork or rear shock returns the wheel to the ground after it has been compressed by an impact. If you get this part of MTB suspension tuning wrong, riding becomes dangerous:
- Rebound too fast: the bike catapults you, kicks back into your hands, and the rear end throws you over the bars on jumps.
- Rebound too slow: the suspension sinks deeper with every new hit ("packing up"), loses travel and eventually turns into a rigid fork, which leads to terrible hand pain.
How to set rebound correctly (the red dial):
- Start from the factory recommendations (clicks are usually counted from the fully closed position – clockwise).
- Find a fast, rough section with plenty of roots that you ride regularly.
- Add 1–2 clicks slower or faster and ride the same segment again. Keep testing until you find the perfect balance where the bike calmly "swallows" the bumps.
4. Compression — Controlling How the Travel Is Used
Compression (the blue dial) is the resistance the suspension offers while it is being compressed. It is divided into two types:
Low-speed compression (LSC)
It controls suspension movement during slow weight shifts. It has the greatest effect on fork dive under hard braking (brake dive), pedaling and "pumping" the bike through corners.
High-speed compression (HSC)
It reacts to extremely fast axle hits (square-edged rocks, slick roots, landing big drops). If you feel a sharp impact through the handlebar in a rock garden, HSC is probably set too closed.
How to adjust compression:
- If the bike "dives" too quickly under braking → close the compression (add more clicks clockwise).
- If it feels too harsh and the fork doesn't absorb small bumps → open the compression (fewer clicks).
PRO TIP: Volume Spacers (Progressiveness)
Volume spacers (also called "tokens") reduce the volume of the air chamber. Adding spacers increases progressiveness – the suspension becomes dramatically firmer at the end of its travel, which prevents painful bottom-outs on big jumps. Removing spacers gives a more linear feel, letting lighter riders use all the available travel. Heavier and more aggressive riders → more spacers. Lighter trail riding → fewer spacers.
5. The Testing System — The Best Method for Riders
To get a perfect MTB suspension tuning result, stop guessing in the parking lot. Follow this system out on the trail:
- Reset all settings to the recommended base values (FOX/RockShox base settings).
- Write your current clicks in your phone (e.g. LSC: -5, Rebound: -8 from closed).
- Ride a short, intense test segment (about 1 minute of riding).
- Always change only 1 click on a single setting, then ride again.
- Note the result and repeat the process until the bike feels ideally stable.
6. Video Guide: Setup in Practice
7. Advanced Tuning and Useful Links
If the factory settings feel limiting, advanced shim tuning inside the damper (restacking the shims inside the oil valve) changes the entire character of how it works. This is done exclusively by professional suspension service centers.
Recommended reading and services:
- ✔ Precision setup tool: Suspension Setup Calculator
- ✔ Downhill riding technique: Downhill and Enduro Guide
- ✔ Related maintenance: Hydraulic brake service
- ✔ Traction: MTB Tire Guide (Tubeless vs Standard)
- ✔ Where to test your setup: Sarajevo cycling routes and the famous Roller Coaster Trail.
- ✔ Official setup charts: FOX Suspension Setup Guide
Setup Order: How to Approach It Without the Confusion
The most common mistake is changing everything at once. Work in order and change one thing per ride.
- Pressure and SAG: set the pressure for your weight and measure SAG; this is the foundation.
- Rebound: adjust the return speed so the wheel follows the terrain without bouncing.
- Compression: after SAG and rebound, set compression to suit your riding style.
- Spacers and volume: if the suspension reaches the end of its travel too early, consider adding spacers.
- Record your changes: write down your settings so you can go back to what works.
When Tuning Isn't Enough
If adjustments don't help, the cause may be worn-out oil or seals. A fork or shock that hasn't been serviced loses sensitivity, and no amount of tweaking will fix that. We service suspension according to manufacturer recommendations, and you can read more in our guide to Fox shocks for bikes. For help choosing a bike, check out trail vs enduro vs downhill, and for a suspension check-up get in touch with our bike service. A good MTB suspension tuning session takes 15 minutes and changes your entire ride; repeat it after every service and at the start of the season. Set your tire pressure using the tire pressure guide.
Sources and Further Reading
- FOX – suspension manufacturer – manuals and specifications
- Bicycle suspension (Wikipedia) – suspension basics
Adjusting for Terrain and Riding Style
The same setup doesn't suit every rider or every trail. A cross-country rider wants efficiency and minimal energy loss on climbs, so a firmer feel and less travel work better. On trail and enduro tracks, grip and control are the priority, which is why the suspension is set softer, with more travel and slower rebound. Downhill riders go even further: the fork and rear shock work through a wide range, and the steepness and speed demand carefully matched compression.
Small Steps, One Change at a Time
The most common mistake is changing several settings at the same time. Then you don't know which change made things better and which made them worse. So change one parameter, ride the same section, note how it feels and only then move on. A notebook or phone app with the date, air pressure and click count will save you hours of guesswork.
Maintaining Your Fork and Rear Shock
The best setup is worthless if the oil is old and dirty or the seals are worn. Manufacturers recommend a short lower-leg service roughly every 50 hours of riding, and a full service every 200 hours or once a year for those who ride often. If you ride in mud and dust, shorten the interval.
- After the ride: clean the stanchions with a damp cloth and apply a thin layer of seal oil.
- Before the season: check the air pressure, the travel and whether there is any play in the rear frame bearings.
- When you notice a change: if the fork is noisy, returns slowly or leaks oil, don't wait for your service appointment.
Seals, Oil and Bearings
Seals keep dust out, while oil lubricates and cools the internal parts. When they wear out, you feel stiction at the start of the travel and a loss of sensitivity on small bumps. Regular replacement is cheap compared with repairing damaged stanchions.
Most Common Setup Mistakes
- Too little or too much air for the rider's weight with gear.
- Rebound that is too fast, making the bike bounce, or too slow, so it can't recover between hits.
- Excessive compression that deadens the response on small bumps and tires your arms.
- Ignoring tire pressure, which also affects feel and grip.
- Adjusting without trail feedback, relying only on the manufacturer's chart.
If you're not sure, the fastest solution is a professional check. Take a look at our bike service page or book an appointment right away, and you can try out your settings on the trails of Bike Park Evolution.
How Temperature and Altitude Affect Shock Performance
The oil in your fork and rear shock changes viscosity with temperature. In cold weather it gets thicker, so rebound and compression feel slower, while in strong heat the oil thins out and the suspension feels softer. That's why riders often open the rebound by one to two clicks before the winter season and close it slightly in summer. The same goes for the air in the chambers: a temperature change of a few tens of degrees changes the pressure, so check it after transporting the bike in a cold or hot car.
Chamber Volume, Tokens and Progressiveness
Most modern forks and rear shocks let you change the air chamber volume using inserts that manufacturers call tokens or volume spacers. More inserts mean less volume, which gives a more progressive feel near the end of the travel and less chance of using all your travel on bigger hits. Fewer inserts give more linear behavior and better sensitivity on small bumps. If you often hit the end of the travel and the pressure is already high enough, add one insert and test again.
How to Test a Change
Pick a section you know well that has a mix of roots, rocks and bigger hits. Ride it three times with your current setup, then make one change and ride it three more times. Pay attention to how much travel you use, whether the bike bottoms out on hits, and whether your arms and back stay relaxed. The rubber ring on the stanchion or a zip tie around the tube shows how much travel you've used.
The Role of Riding Technique and Body Position
Even the best-tuned shock can't make up for poor body position. If your weight is too stiff over the rear wheel, the fork can't do its job, and if you're too far forward, the rear end goes unused. Practice a neutral stance: slightly bent knees and elbows, weight evenly distributed and your eyes looking far ahead. Only after that does it make sense to chase small differences in settings.
A Quick Checklist Before Every Ride
- Check the air pressure in the fork and rear shock.
- Check your rebound and compression settings against your notes.
- Look for oil leaks or damage on the stanchions.
- Wipe the dust off the seals before the first descent.
Frequently Asked Questions (FAQ)
The golden rule from most manufacturers is a "small service" every 50 hours of riding, and a major service (with a damper oil change) every 125 to 200 hours, depending on how aggressively you ride and how dusty your trails are.
Always strictly in this order: first pump up the air and set SAG (because air pressure directly affects spring force), then set rebound, and only at the very end fine-tune compression.
Absolutely. Technical, steep and very rocky trails call for a softer setup with faster rebound, while flow trails with big jumps and berms need firmer suspension and extra compression so the bike doesn't lose speed when pumping.
Need a Professional Service?
If you want advanced tuning, an oil change, shim tuning or a full service of your FOX/RockShox suspension, our expert team is at your disposal in Vojkovići (East Ilidža).
Book a Suspension Service