Technical tips · Ergonomics
Bike Seat Adjustment:
height, position and tilt
Proper bike seat adjustment decides whether your knees, back or hands start hurting after an hour in the saddle. Here is how to set your saddle height, fore-aft position and tilt in about ten minutes.
By Marko Ristivojević, Master Bike Mechanic
In short
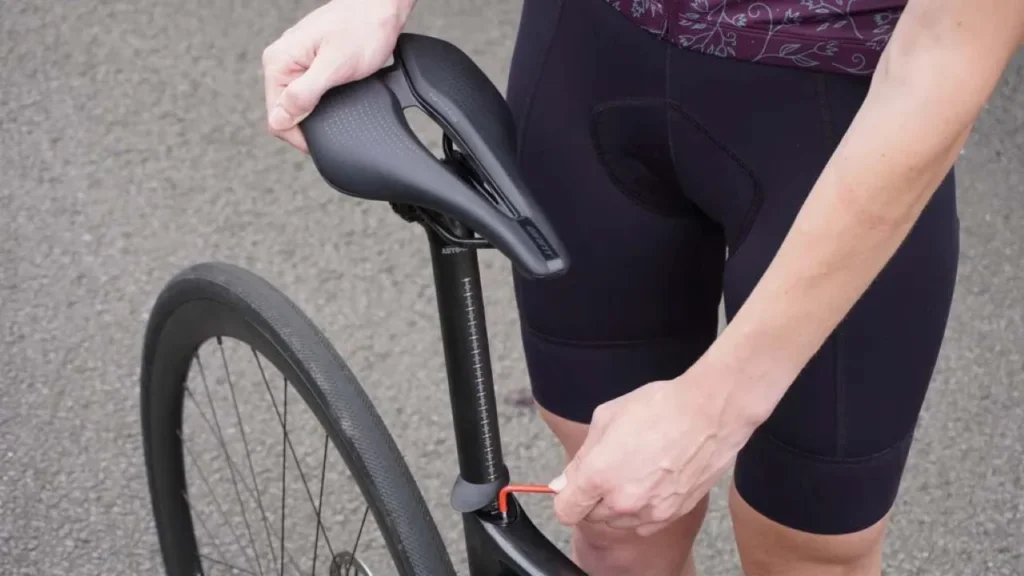
Here is how bike seat adjustment works: set the saddle height so your leg is slightly bent at the bottom of the pedal stroke, slide the saddle so your knee sits over the pedal spindle, and keep the saddle tilt close to level. Make every change in small steps and check it with a ride.
Tools
4/5/6 mm Allen keys
Time
10 min
Difficulty
Easy
Recommended
Torque wrench
Author: Marko Ristivojević, Master Bike Mechanic · BK MTB Evolution, Istočno Sarajevo
Why bike seat adjustment matters
A poorly set-up bike seat is one of the most common causes of knee pain, numbness and fatigue on longer rides. The good news is that most problems can be solved with a plain Allen key and a little patience.
Bike seat adjustment consists of three separate steps: height, fore-aft position and tilt. Change one at a time and take a short ride after each, because even a few millimeters can make a noticeable difference.
How to adjust bike seat height
Loosen the clamp. Open the quick-release (QR) lever or loosen the Allen bolt on the seatpost clamp, usually 4, 5 or 6 mm.
Find the right height. Sit on the bike with your heel on the pedal at its lowest point. Your leg should be almost straight, and when you put the ball of your foot on the pedal, your knee stays slightly bent.
Watch the minimum insertion mark. The "minimum insertion" mark on the seatpost must stay hidden inside the frame. If it is visible, the post is extended too far and the frame can be damaged.

Fore-aft saddle position
The saddle slides along the rails. Two Allen bolts under the saddle hold the clamp, and the saddle can be moved forward and back along the rails.
Plumb line check. With the cranks horizontal, a plumb line dropped from just below the kneecap should pass through the axle of the front pedal.
Loosen evenly. Loosen the bolts by the same amount so the saddle does not twist, and move it in small steps.
Respect the markings. The rails have MAX marks. The clamp must not go beyond them, because the rails can give way or break.
Saddle tilt
Tilted too far back. The saddle then "slides" out from under you and often causes numbness and pressure on soft tissue.
Tilted too far forward. Your weight shifts onto your hands and arms, so your shoulders and wrists tire quickly.
Two bolts on the clamp. To raise the nose of the saddle, loosen the front bolt and tighten the rear one. To lower the nose, do the opposite.
Start from level. Set the saddle as close to horizontal as possible, and only then change the saddle tilt by one or two degrees.

Carbon seatpost and maintenance
Carbon paste. On a carbon seatpost and carbon frame, use a dedicated carbon assembly paste, which increases friction without excessive clamping force.
No grease on carbon. Grease on carbon reduces friction and the post can easily slip. Clean an aluminum seatpost from time to time and lightly lubricate it.
Torque wrench. On carbon, always use a torque wrench and follow the value printed on the clamp or post, usually 5 to 6 Nm.
Final check before you ride
Check all bolts. Before you set off, make sure the clamp, rails and quick-release are properly tightened.
Short test ride. Ride for a few minutes and pay attention to your knees, back and hands, then fine-tune by a millimeter or two if needed.
Note your measurements. Mark the seatpost height with a pencil or marker so it is easy to restore after transport or service.
Tip: once your bike seat adjustment is done, grab the saddle by the nose and try to twist it and pull it upward. If it does not move, you are finished. If you need a reference for positioning, also see the Park Tool guide.
FAQ
Should the saddle be perfectly level?
It is best to start from level and then, if needed, tilt the nose by one or two degrees. Large angles usually mean the height or position is off, so revisit your bike seat adjustment from the start.
Why does my saddle creak or squeak?
The most common cause is a dry or dirty seatpost, clamp or rails. Clean them, apply a little grease or carbon paste, and tighten with a torque wrench.
How tight should the saddle bolts be?
Follow the value printed on the clamp, usually 5 to 6 Nm. Overtightening can damage carbon, while undertightening lets the saddle slip.
How do I know the saddle is at the right height?
With the pedal at its lowest point, your knee should be slightly bent, and your hips should not rock from side to side as you pedal.