Knowing how to set up tubeless tires on a bike is the question we hear in the workshop every week. The tubeless system, tires without an inner tube, has become the standard on MTB and gravel bikes: fewer flats, better grip and a more comfortable ride. With the right tools and a bit of patience, you can do the conversion yourself. This is the procedure we use in the MTB Evolution workshop.
In short:
- To make the switch you need Tubeless Ready (TR) tires and rims, tubeless tape, a valve and sealant.
- The key to success is tape applied without bubbles or wrinkles.
- An MTB wheel needs about 60–100 ml of sealant, topped up with 30–50 ml every few months.
- To seat the tire for the first time you will usually need a compressor or a booster pump.
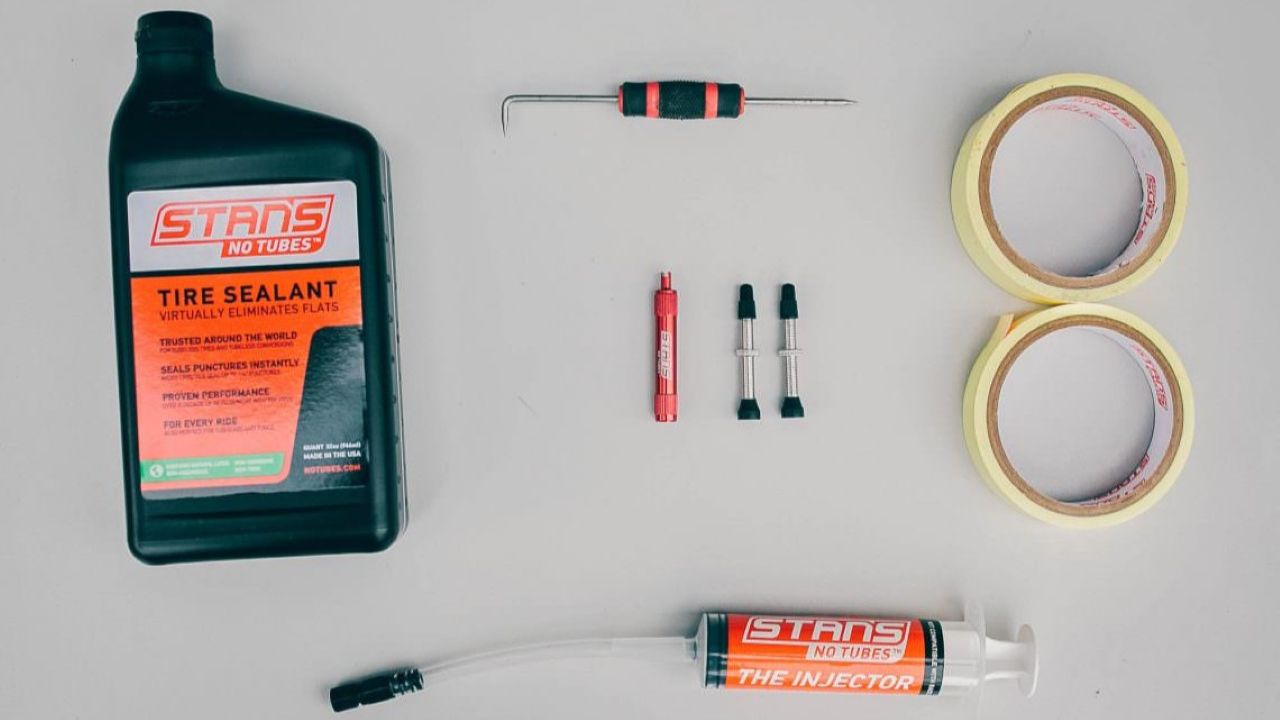
How to set up tubeless tires: what you need
Before you start, lay out the following tools and parts on your workbench:
- Tubeless-compatible tires and rims: look for the markings “Tubeless Ready”, “TR”, “TCS” or “TLE”.
- Sealant: a special liquid made for tubeless systems.
- Tubeless tape: the right width, usually 2–3 mm wider than the inner profile of the rim.
- Tubeless valve: the right length, Presta, with a removable core.
- Scissors and a sharp tool (an awl or a small Phillips screwdriver) for the valve hole.
- Valve core tool or small pliers.
- Tire levers: for help choosing, see the best tire levers.
- Sealant injector: not essential, but it makes the job much easier.
- Compressor or booster pump: sometimes a good floor pump is enough, depending on the rim and tire combination.
The 9-step tubeless conversion
1. Check compatibility
Make sure your tires and rims are compatible with the tubeless system. The marking is on the label or molded into the tire and the rim (Tubeless Ready, TR, TCS, TLE).
2. Remove the wheel and the existing tire
Take the wheel off, release the air and carefully remove the outer tire and the inner tube with tire levers.
3. Clean the rim
Remove any old plastic rim strip that isn't meant for tubeless. Clean the inside of the rim with isopropyl alcohol so the new tape sticks perfectly.
4. Apply the tubeless tape
Start two spoke holes away from the valve hole, pull the tape tight and press it into the rim channel with your thumb, without bubbles. Go all the way around and finish two spoke holes past the valve, then press the tape down hard once more with a rag.

5. Install the tubeless valve
Use a sharp tool to pierce a small hole in the tape, exactly over the valve hole. Insert the valve and tighten the O-ring nut by hand, no pliers.
6. Mount the outer tire
Fit the tire, paying attention to the rotation direction marked by the arrow. Pull both beads into the central channel of the rim. If you don't have an injector, leave the last 20 cm or so open.
7. Add the sealant
Pour in the recommended amount of sealant, usually 60–100 ml for MTB, depending on tire width. An easier way: mount the tire, remove the valve core and inject the sealant through the valve with an injector.

8. Inflate and seat the tire
Use a compressor or a tubeless booster pump to deliver a large burst of air quickly. When the beads snap into the rim, you will hear a loud “pop-pop”. Never exceed the maximum pressure printed on the tire.
9. Spread the sealant
Spin the wheel and shake it from every angle so the sealant closes the micro-gaps around the bead and the valve. Leave it for a few hours and check that it holds pressure.
Benefits of switching to tubeless
- Fewer flats: the sealant closes holes from thorns and sharp rocks in a fraction of a second, and there are no “snake bites” (pinch flats).
- Lower pressure: with no tube to get pinched against the rim, you can run lower pressure for more grip and comfort. Work out the right pressure with the tire pressure calculator.
- Lower rotating weight: without heavy tubes the wheels are lighter and the bike feels more agile.
If you're still undecided, compare both systems in our article on tubeless vs regular tires. Sealant makers such as Stan's NoTubes also publish recommended amounts for every tire size.
Didn't work? Get tubeless done without the hassle
Mounting tubeless tires can be frustrating and messy, especially when the tire refuses to seat on the rim. If you don't have a compressor, or you want to be sure the job is done right, leave it to us.
We do the whole conversion, including tape, valves and sealant. See the price and service details on the page tubeless system: conversion in our workshop.
Book a tubeless conversionFrequently asked questions about tubeless tires
How much sealant should I put in a tire?
It depends on wheel size and tire width. For a road or gravel bike about 40–60 ml is enough, while a 29-inch MTB wheel usually takes 80–120 ml. E-bike and fat bike tires need more.
Do I still need to carry a spare tube with tubeless?
Yes. Tubeless deals with thorns and small punctures, but if a rock slices the sidewall by more than 5–6 mm, the sealant can't close it. In that case you put in a spare tube to get home.
Can I convert regular tires to tubeless?
In theory it is possible, but we don't recommend it. Regular tires don't have the right bead profile and are more porous, so they can come off the rim in a corner. Use only Tubeless Ready components.