Tubeless vs tubes is a question every MTB rider asks in the workshop sooner or later. Tires play a key role in performance, comfort and safety, and the right choice can transform your ride, whether you're hitting technical descents, long climbs or gravel. In this guide we explain the differences between tubeless systems (tires without an inner tube) and classic tires with tubes, their pros and cons, and when each option makes more sense.
In short:
- Tubeless tires have no inner tube; sealant seals the tire and closes small holes from thorns and sharp stones on its own.
- Tubeless allows lower pressure, better grip and less rotating weight.
- Tubeless sealant needs topping up every 2–6 months.
- Tires with tubes are cheaper and easier to fix on the trail, but they puncture more easily.
- We recommend tubeless for enduro, trail and downhill; for recreational gravel riding, a tube is perfectly fine.

Tubeless vs tubes: what are tubeless MTB tires
Tubeless MTB tires have no inner tube. The tire mounts directly on a tubeless-compatible rim and is sealed with a special liquid (sealant) that stops air from escaping and closes small holes when you get a puncture. We described the full installation process in our guide on how to set up tubeless tires.
Advantages of tubeless
- Fewer flats: the sealant automatically closes small holes from thorns, stones or glass.
- Lower pressure: running less air increases grip and comfort.
- Less weight: without a tube, rotating mass goes down.
- Better performance on technical terrain: extra grip and stability make tubeless a great choice for enduro, trail and downhill.
Disadvantages of tubeless
- More complex installation: you need sealant, compatible rims and a tubeless pump or compressor.
- Maintenance: the sealant has to be topped up every 2–6 months, and the tires need regular cleaning.
- Higher cost: tubeless parts and upkeep cost more up front.
Classic tires with inner tubes
This is the traditional system, where the tire is mounted with an inner tube that holds the air pressure. If you ever need a hand with swapping a tube, see our guide on how to change a bike tire, or let the workshop handle tire replacement and inner tube installation.
Advantages of tubes
- Easy fitting and replacement: quick and simple to install or swap on the trail.
- Lower price: cheaper tires and tubes, ideal for beginners and recreational riders.
- Less maintenance: no liquid, no sealing and no special tools.
Disadvantages of tubes
- Higher risk of punctures: thorns and sharp objects can easily pierce the tube.
- Less grip: because of the higher pressure, the tire has less contact with the ground.
- Less comfort: more impacts are transferred to your hands and body.
Tubeless vs tubes: comparison table
| Criteria | Tubeless | Inner tube |
|---|---|---|
| Puncture resistance | High (sealant closes small holes) | Lower |
| Working pressure | Lower, more grip | Higher |
| Rotating mass | Lower | Higher |
| Installation | More demanding, needs a compressor | Simple |
| Maintenance | Sealant every 2–6 months | Minimal |
| Initial cost | Higher | Lower |
| Best for | Enduro, trail, downhill | Recreation, asphalt, gravel |
Which system is right for you
When it comes to tubeless vs tubes, the answer depends on your riding style, terrain and budget.
- For recreational riders who mostly ride asphalt and gravel, classic tires with tubes are simple, cheap and reliable.
- For serious MTB riders who ride aggressive trails, enduro and downhill, tubeless offers better control, fewer flats and more grip.
If you often ride rocky, rooty and changing terrain, like at our Bike Park Evolution, consider making the switch to tubeless. Work out the right pressure for either system with the tire pressure calculator, and check our bike tire pressure guide for typical starting values.
Tips for switching to tubeless
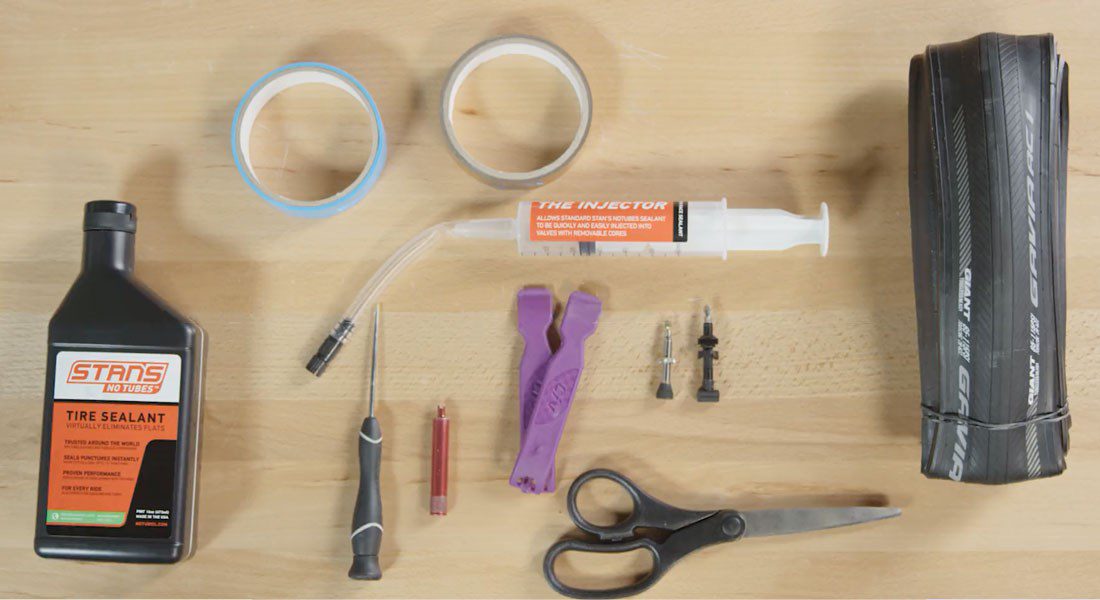
- Check that your rims and tires are "tubeless ready".
- Get the right sealant, valves and rim tape.
- Use a compressor or a tubeless pump for the first inflation.
- Regularly check the sealant level and the condition of the tire.

Conclusion
Tubeless vs tubes is a decision every MTB rider should make based on their own needs. Tubeless brings plenty of advantages, but classic tires are still a reliable and practical option for many cyclists. If you want a hassle-free switch, we handle the installation and sealing as part of our service: tubeless system: benefits and installation.
Switching to tubeless? Leave the installation, sealant and rim check to the workshop.
Book a tubeless installationFrequently Asked Questions
Tubeless vs tubes: what is the main difference?
Tubeless tires have no inner tube and use a liquid (sealant) that closes small holes when you get a puncture, while classic tires use an inner tube that holds the pressure.
Can I switch from tubes to tubeless tires?
Yes, but you need tubeless-compatible rims, suitable tires, valves and sealant, as well as a compressor or a tubeless pump for inflation.
How often should I top up the sealant in tubeless tires?
Sealant should be topped up every 2 to 6 months, depending on temperature, how hard you ride and the type of liquid.
Should I carry a spare tube on a tubeless bike?
Yes. If the sealant can't close a bigger cut, a spare tube gets you home.