Proper MTB chain replacement is the most important mechanical job every rider has to master. Your bike chain takes the worst beating on the trail. Dust, mud, water and extreme forces on steep climbs wear the material down relentlessly. Replacing the chain regularly isn't just about smooth, precise shifting – it's the cheapest life insurance for your expensive cassette and chainring.

When a chain stretches too much (wears out), it loses its perfect pitch and literally starts to "eat" your cogs. That's why timely replacement of a mountain bike chain is an absolute priority in the MTB world. As we often stress in our Small Workshop, prevention is always cheaper than repair. Before we start, take a look at our official chain lubrication service guide too.
1. Checking the Length of the Old Chain
If your old chain worked perfectly and never dropped off over rough terrain, we'll use it as a reliable template for the new one. Still, we first need to be sure it was the right length to begin with.
Shift into the biggest chainring at the front (if you have more than one) and the biggest cog at the back (on the cassette). The chain must handle this extreme combination without trouble, leaving two gentle bends as it passes through the pulleys of the rear derailleur.
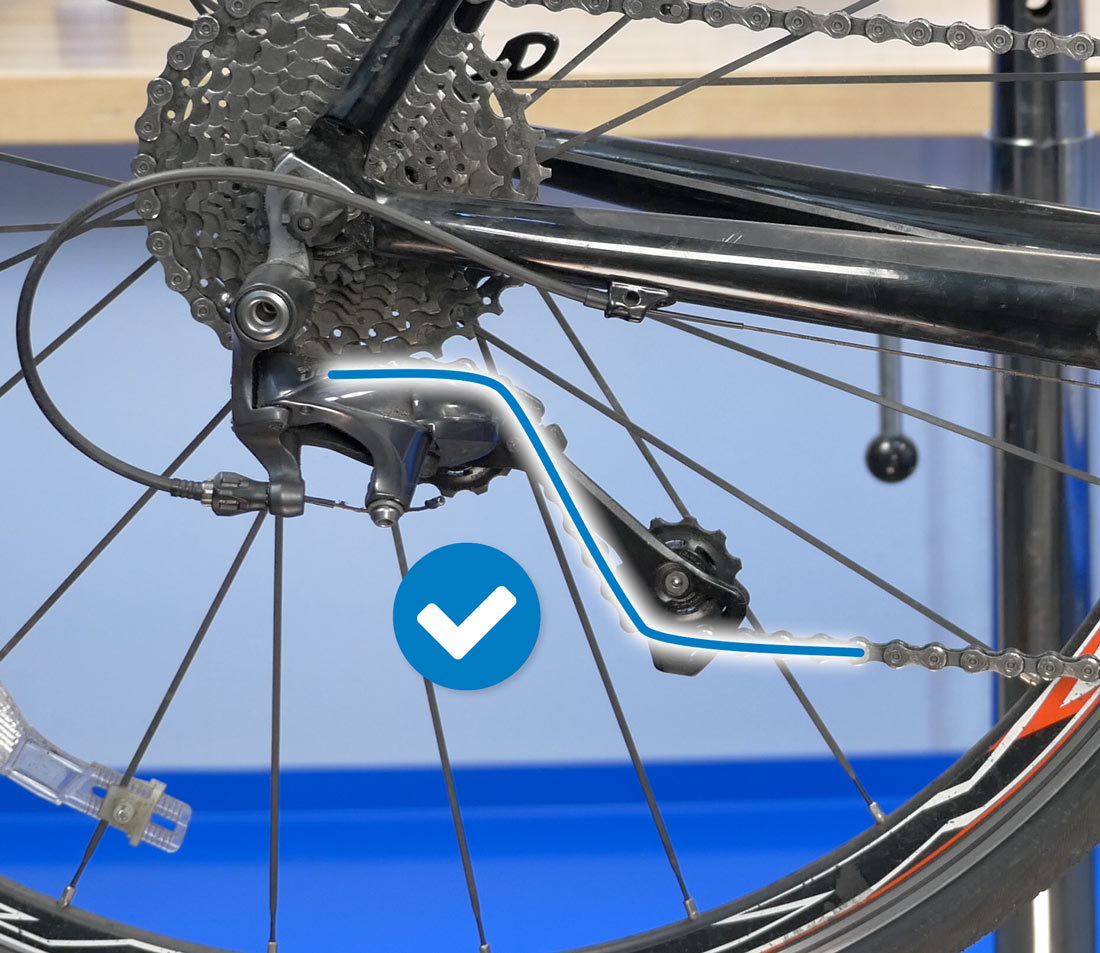

2. Removing the Chain from the Bike
Take off the rear wheel. It isn't technically required, but it instantly takes the tension off the chain, makes your life easier and stops the derailleur from "springing" back. Most modern mountain bike chains (SRAM Eagle, Shimano 12-speed, KMC) use a handy quick link (Master Link).
Find the link that looks different from the rest, position it on the lower run of the chain and open it with dedicated master link pliers (such as the Park Tool MLP-1.2). If your chain has no quick link, or it's so caked in mud that you can't be bothered to look for it, simply grab a chain breaker tool and cut it anywhere.
3. Cutting the New Chain to Length
This is where many riders make a fatal mistake during MTB chain replacement. The old chain has stretched over time, so you can't simply count centimetres. You have to measure strictly link by link (pin by pin).
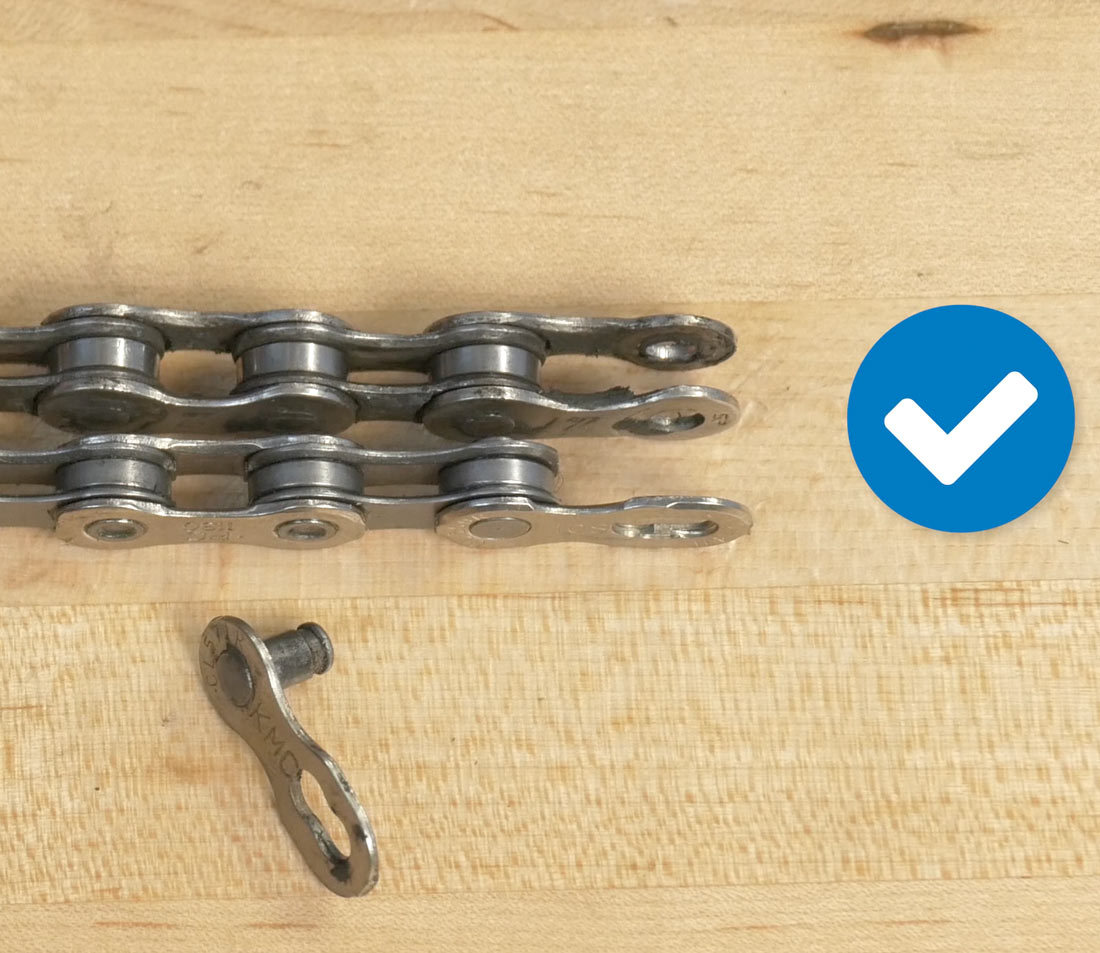
Lay the old and new chains on a flat workbench. Hook them together at one end with a nail, a screwdriver or an old quick link. Pull them taut and line them up. The golden rule of mechanics: always match outer plate to outer plate, or inner plate to inner plate. Cut the new chain with the tool at exactly the pin where the old one ends.
4. Threading Through the Derailleur (Watch the Tab!)
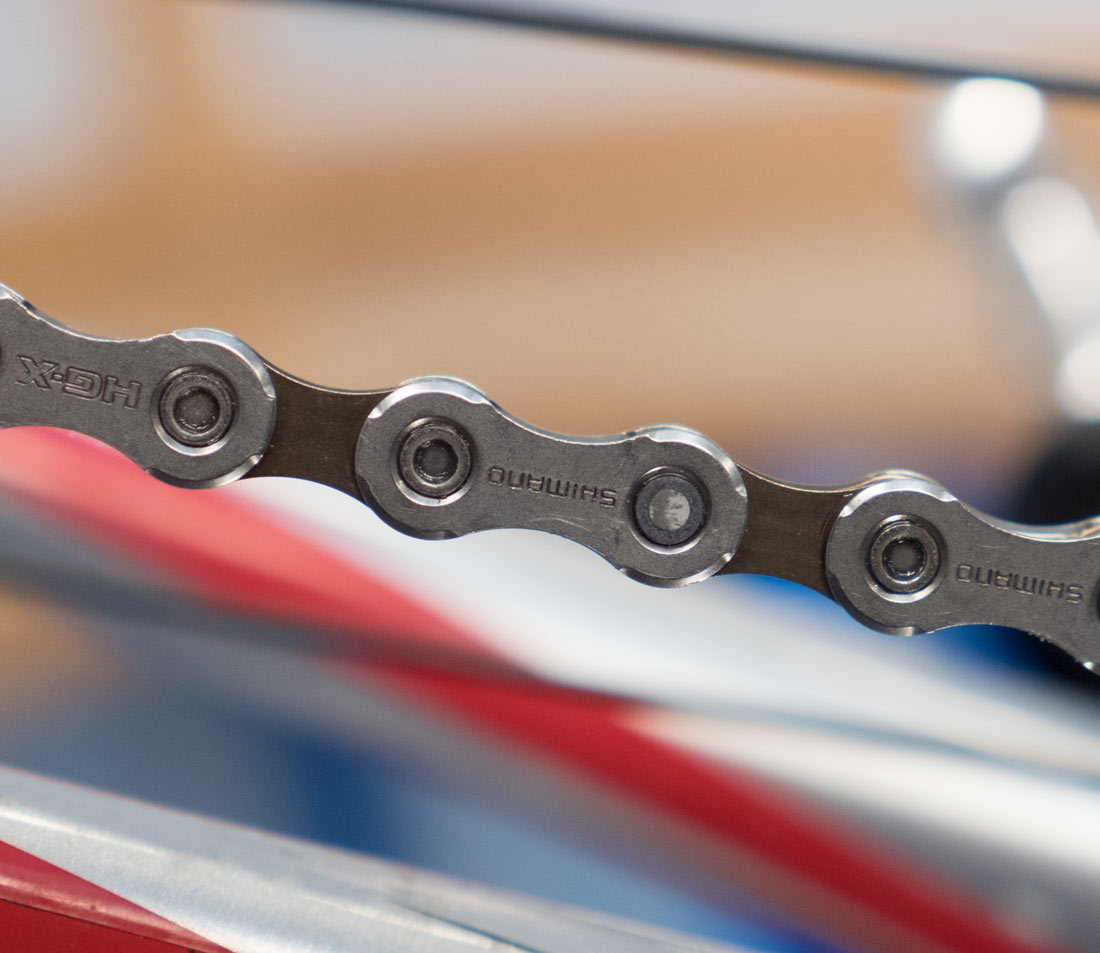
Some new high-performance chains (e.g. Shimano HG+) are asymmetric – they have a clearly marked direction of rotation. The letters, arrows and manufacturer logos must always face you (outward).
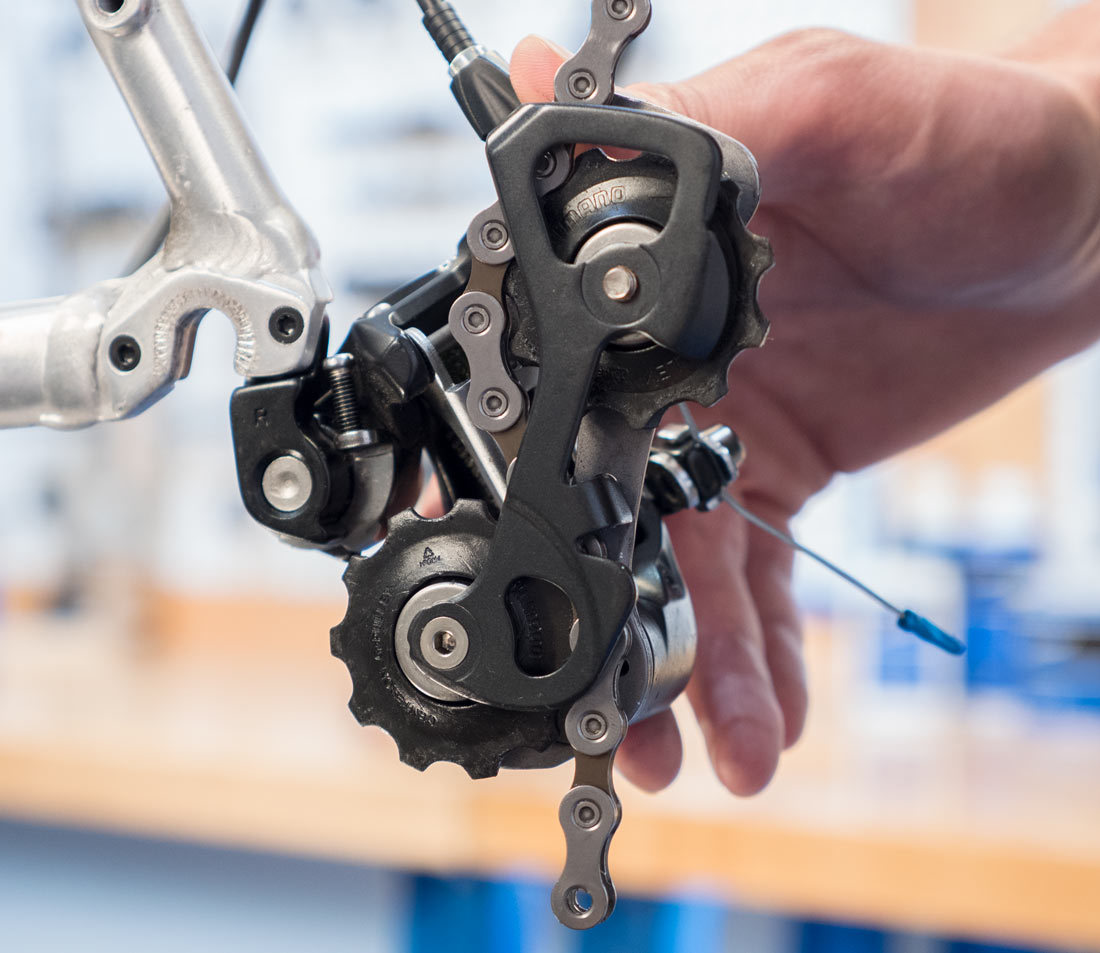
Carefully thread the chain through the rear derailleur cage. The biggest beginner mistake in service: routing the chain over the small metal tab on the cage, right between the two derailleur pulleys. The chain must run underneath it in a straight line. Get it wrong and you'll listen to an awful metal-on-metal scrape on every pedal stroke.

5. Connecting the Chain
Quick Link Method (MTB Standard)
This is the absolute standard on the trails today. Join the chain ends with a new quick link (be sure to follow the direction arrow if one is printed on it). To lock it quickly and securely: place the link on the upper run of the chain (above the chainstay), squeeze the rear brake hard and stamp firmly on the right pedal. You'll hear a loud, clear "click" when the link seats. This knowledge is vital out on the trail, and it's also the core of MTB chain replacement in the field – so be sure to read our trail guide on what to do when your bike chain breaks.

Classic Pin Method (Rivet)
If you use a classic connecting pin (common on older Shimano 9- or 10-speed systems), lightly lubricate it and always push it from the inside of the bike outward. The tool will feel stiff at first, then easy, then stiff again as the pin passes through the second plate. Once it sits completely flush with the other pins on the chain, use pliers to snap off the excess (the pilot tip) sticking out.
PRO TIP: Final Test on the Stand
Spin the pedals backward and watch closely how the chain passes through the derailleur pulleys. If a link "hops" or snags, grab the chain by hand at that spot and gently flex it sideways to free the stiff link. Warning: If the new chain skips badly on the cassette under load on your first climb, it means just one thing – you rode the old chain too long and now you have to replace the cassette too!
How to Choose the Right Chain Before MTB Chain Replacement
Before you start swapping the chain, make sure you're buying the right one. The most common mistake is a chain that doesn't match the drivetrain.
- Number of speeds. The chain must match the number of cogs on the cassette, because its width is made to fit the spacing between the teeth.
- Manufacturer. Chains from the same brand work best with that brand's derailleurs, although mixing is possible.
- Link type. A quick link is made for a specific chain, so don't mix it with a different model.
- Length. A new chain is cut to match the old one, or according to the rule for your chainring size.
Chain, Cassette and Chainring: Replace Together or Separately
If you change the chain on time, you usually don't need to replace the cassette and chainring. If you waited too long, the old chain has already worn the teeth and the new chain will skip under load. That's the most common reason riders think a new chain is bad. Check the guide on bike component wear to assess the condition of the whole drivetrain. Bike chain replacement is simple, but only if the chain is compatible with the other parts. If you'd rather have a pro handle the whole job, see our chain and cassette service.
After the Swap
Lubricate the chain with dry or wet lube depending on conditions, and wipe off the excess so it doesn't attract dirt. Not sure which one to use? Our guide to bike grease and oil will help you pick. Run the bike on the stand through all the gears and check that the derailleur shifts properly. If the chain still skips or the shifting lags, try a derailleur adjustment with the H, L and B screws, or leave the bike at bike service and we'll check the drivetrain.
Sources and Further Reading
- Bicycle chain (Wikipedia) – chain construction and wear
- Derailleur gears (Wikipedia) – how derailleurs work
MTB Chain Replacement: Frequently Asked Questions (FAQ)
Replace the chain when it has stretched between 0.5% and 0.75%. The most precise way to measure this is with a dedicated chain wear tool (Chain Checker). If you go past 0.75%, you will probably have to replace the rear cassette as well.
Most manufacturers (such as SRAM and Shimano) explicitly recommend using 11- and 12-speed quick links only once. Reusing them significantly increases the risk of the chain breaking on the trail.
On directional chains, such as some high-performance Shimano HG+ models, the letters, arrows and manufacturer logos must always face outward, toward you.
If a new chain skips badly on the cassette under load on the first climb, it means you rode the old chain too long and now have to replace the cassette as well.
Is Your Chain Skipping, or Don't You Have the Right Tools?
Don't risk damaging your expensive cassette and derailleur. Leave the chain swap and fine-tuning of the drivetrain to our certified mechanics.
Book a Professional Bike Service