Protocol: Attack Position Pro – Dynamic Dominance
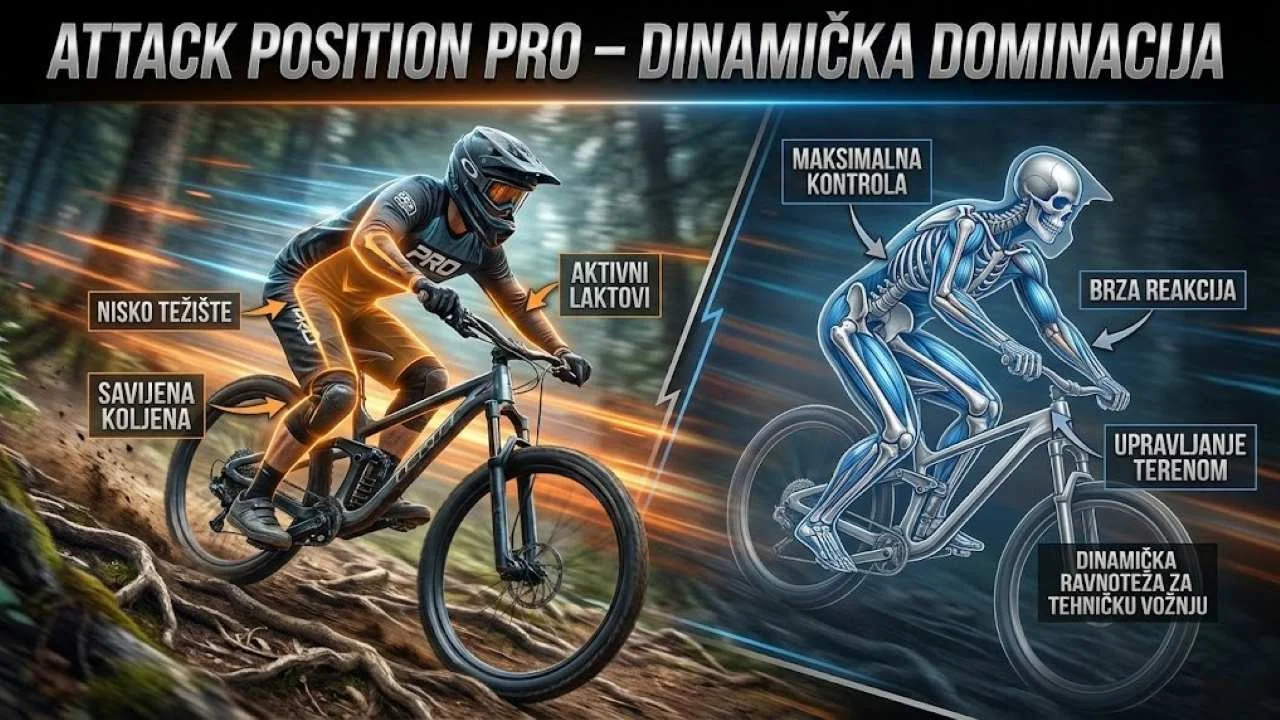
Goal: Take your attack position from "surviving the terrain" to "exploiting the terrain". Generate speed by pumping and get maximum traction by manipulating your center of gravity.
A pro rider never stands "frozen" in one position. They use the full range of motion, constantly moving the bike back and forth and up and down beneath them to keep momentum. That is the essence of the Attack Position Pro technique that separates amateurs from the elite.
Advanced Terms Glossary
1. Biomechanics: Hip Hinge vs. Squat
At Level 2 we teach riders to "squat". At Level 3, we need to get more precise with the biomechanics. A squat overloads the quadriceps, which burn out quickly.
- Movement: Push your hips back and tilt your torso forward (like a gym deadlift).
- Back: Spine stays flat (neutral), chest is open and "looking" down the trail.
- Result: You engage the Posterior Chain – the strongest muscles in the body.
2. Dynamics: The "Radar" System (Forward-Back)
Picture the bike's cockpit as a radar screen. A Level 2 rider is a dot in the middle (Static). A Level 3 rider uses the whole screen (Dynamic).
| Trail situation | Level 2 (Static) | Level 3 (Pro Dynamics) |
|---|---|---|
| Corner entry | Stays in the middle. | Chin Over Stem: Pushes forward for front-wheel grip. |
| Steep descent / Drop | Hangs behind the saddle (passive). | Arm extension: Pushes the bike out in front, hips low and back. |
| Rock Garden | Stiffens up and clamps the bars. | Floating: Arms and legs work like pistons, the bike dances underneath. |
| Braking | Stays high. | Lower CoG: Drops the hips lower (Hip Hinge) to neutralize the force. |
3. Generating Speed: The Art of Pumping
A Level 2 rider lets gravity accelerate them. A Level 3 rider creates speed where there is none. This is the essence of the Attack Position Pro technique.
As you enter a dip (downhill), push the bike hard into the ground with your arms and legs. This is where the energy is created.
As you exit the dip (uphill), pull the bike toward you and unweight it (Light). The result is "free" speed.
4. Attack Position Pro Drill: The "Chainless Run"
The fastest way to learn this stance is to remove the option of pedaling.
- Drill: Take the chain off the bike (or mentally ban yourself from pedaling).
- Trail: A short section with a gentle slope and a few corners/bumps.
- Goal: Reach the bottom faster than you do with the chain on.
- Method: You have to use your dynamic stance to "pump" every bump. If you stand static, you will stop.
Pro Tips for Level 3
A pro rider is tense only at the moment of action. Between obstacles, they relax ("Reset"). If you're tight 100% of the time, you'll get arm pump within 2 minutes.
Your arms steer, your legs carry the weight. Your arms must stay "light" to feel the feedback from the ground, while your legs do the heavy work of absorbing impacts.
On extreme slopes, rotating your heels (left/right) helps initiate a turn with the rear end of the bike.
Frequently Asked Questions About the Pro Technique
What is the difference between the basic stance and Attack Position Pro?
How long does it take to master it?
Does this technique work on hardtail bikes too?
"The attack position is not a pose for photos. It is your fighting stance. At Level 3, you stop being a passenger on the bike and become the pilot. Get out on the trail and learn to create speed from the ground itself."